安装与配置authpuppy:
源码包:
#wget https://launchpad.net/authpuppy/trunk/1.0.0-stable/+download/authpuppy-1.0.0-stable.tgz
#cd /home
tar -xvf authpuppy-1.0.0-stable.tgz
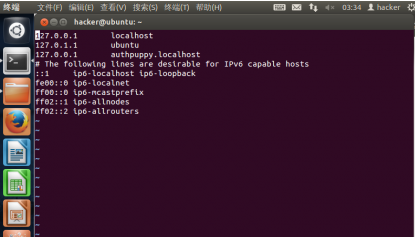
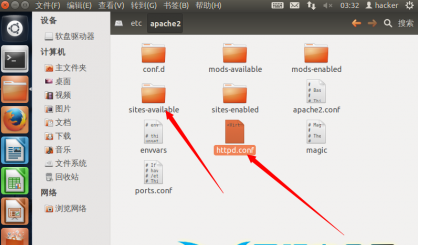
#// apache配置一个虚拟域名(比如http://authpuppy.localhost/)指向目录 /home/authpuppy
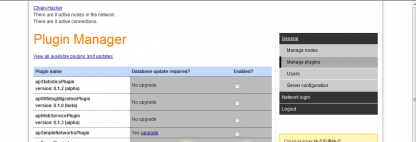
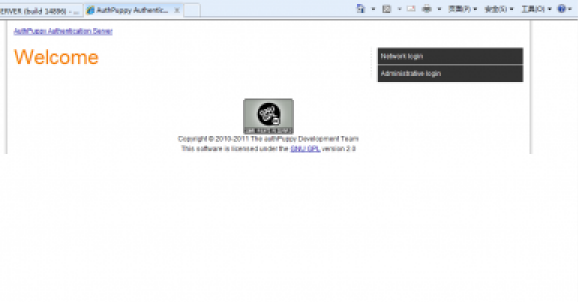
打开http://authpuppy.localhost/
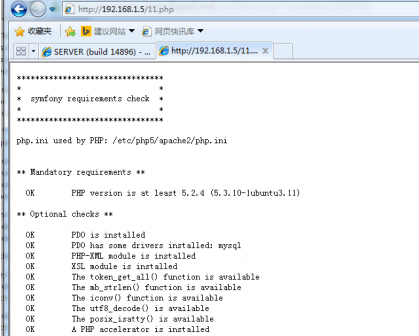
按提示完成对依赖包的安装(Requirements下的最好都安装), 如下:
依赖库: // 主要是PHP扩展包
APCu:
http://blog.163.com/liyi8798@126/blog/static/674546582012012115111847/
#wget http://pecl.php.net/get/apcu-4.0.6.tgz
#phpize
#./configure --with-php-config=/usr/local/php/bin/php-config --enable-apcu --enable-apc-bc
#make -s
#make install
#vi /usr/local/php/etc/php.ini
extension=apcu.so
// 其他类似
Permissions下出现红色部分,则需要做下面操作:
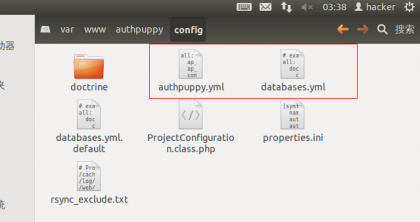
#chmod a+w authpuppy/ -R
#//自动创建authpuppy.yml

// 必须需要启用pdo_mysql,因为symfony的用的是PDO, 灵感来自http://bbs.csdn.net/topics/390036982
#cd php-5.6.2/ext/pdo_mysql
#phpize
#./configure --with-php-config=/usr/local/php/bin/php-config --with-pdo-mysql=/usr/local/mysql/
#make -s
#make install

#mysqladmin -uroot -p create authpuppy
#mysql -uroot -p

#create user 'authpuppy'@'localhost' identified by 'authpuppydev';
#grant all privileges on authpuppy.* to 'authpuppy'@'localhost' with grant option;

// 按界面来走就好了。
问题卡在连接不上mysql服务器上了两天,解决办法:
步骤1, 在http://authpuppy.localhost/install/3中点击next会有提示,如下:
Impossible to connect to the database with those credentials. Please make sure the database exists and try again.
此时,从/home/authpuppy目录中找到php的源码,如下:
#grep "Impossible to connect to the database" * -R
apps/frontend/modules/install/actions/actions.class.php: $this->getUser()->setFlash('error', "Impossible to connect to the database with those credentials. Please make sure the database exists and try again.", false);
打开上面文件,找到相应的行,将Exception $e打印出来
#vi apps/frontend/modules/install/actions/actions.class.php
// $this->getUser()->setFlash('error', "Impossible to connect to the database with those credentials. Please make sure the database exists and try again.", false);
$this->getUser()->setFlash('error', $e, false);
再在http://authpuppy.localhost/install/3中点击next, 出现提示:
exception 'Doctrine_Connection_Exception' with message 'Couldn't locate driver named mysql' in /home/www/authpuppy/lib/vendor/symfony/lib/plugins/sfDoctrinePlugin/lib/vendor/doctrine/Doctrine/Connection.php:486 Stack trace: #0
/home/www/authpuppy/lib/vendor/symfony/lib/plugins/sfDoctrinePlugin/lib/vendor/doctrine/Doctrine/Connection/Mysql.php(101): Doctrine_Connection->connect() #1
/home/www/authpuppy/lib/form/apDatabaseInstallForm.php(133): Doctrine_Connection_Mysql->connect() #2
/home/www/authpuppy/apps/frontend/modules/install/actions/actions.class.php(173): apDatabaseInstallForm->save() #3
/home/www/authpuppy/apps/frontend/modules/install/actions/actions.class.php(71): installActions->executePage3(Object(sfWebRequest)) #4
/home/www/authpuppy/cache/frontend/prod/config/config_core_compile.yml.php(459): installActions->executeIndex(Object(sfWebRequest)) #5
/home/www/authpuppy/lib/model/authpuppycore/util/apActions.class.php(56): sfActions->execute(Object(sfWebRequest)) #6
/home/www/authpuppy/cache/frontend/prod/config/config_core_compile.yml.php(945): apActions->execute(Object(sfWebRequest)) #7
/home/www/authpuppy/cache/frontend/prod/config/config_core_compile.yml.php(940): sfExecutionFilter->executeAction(Object(installActions)) #8
/home/www/authpuppy/cache/frontend/prod/config/config_core_compile.yml.php(926): sfExecutionFilter->handleAction(Object(sfFilterChain), Object(installActions)) #9
/home/www/authpuppy/cache/frontend/prod/config/config_core_compile.yml.php(1021): sfExecutionFilter->execute(Object(sfFilterChain)) #10
/home/www/authpuppy/apps/frontend/lib/CheckDBAvailabilityFilter.class.php(95): sfFilterChain->execute() #11
/home/www/authpuppy/cache/frontend/prod/config/config_core_compile.yml.php(1021): CheckDBAvailabilityFilter->execute(Object(sfFilterChain)) #12
/home/www/authpuppy/cache/frontend/prod/config/config_core_compile.yml.php(988): sfFilterChain->execute() #13 /home/www/authpuppy/cache/frontend/prod/config/config_core_compile.yml.php(1021): sfRenderingFilter->execute(Object(sfFilterChain)) #14
/home/www/authpuppy/cache/frontend/prod/config/config_core_compile.yml.php(658): sfFilterChain->execute() #15
/home/www/authpuppy/cache/frontend/prod/config/config_core_compile.yml.php(2340): sfController->forward('install', 'index') #16
/home/www/authpuppy/lib/vendor/symfony/lib/util/sfContext.class.php(170): sfFrontWebController->dispatch() #17
/home/www/authpuppy/web/index.php(15): sfContext->dispatch() #18 {main}
步骤2, 从第一句“'Doctrine_Connection_Exception' with message 'Couldn't locate driver named mysql'”中可以看出,肯定是没有相关连接mysql的驱动,于是网上查找
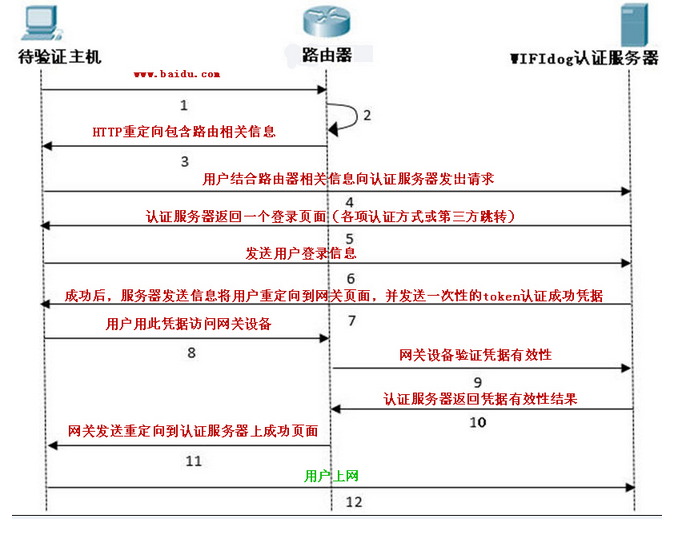
www.baidu.com 查找“'Doctrine_Connection_Exception' with message 'Couldn't locate driver named mysql'”
有一个类似的问题,点击链接http://bbs.csdn.net/topics/390036982
其中一行是:
dream1206回复于: 2012-05-06 00:50:17
你需要启用pdo_mysql
windows下去掉 pdo_mysql.dll前面的注释,重启服务器。linux下编译时加上 with-pdo-mysql。
如果你已经这么做了,那么看看phpinfo()中的配置是否有生效
步骤3, 果断安装pdo_mysql
// 必须需要启用pdo_mysql,因为symfony的用的是PDO, 灵感来自http://bbs.csdn.net/topics/390036982
cd php-5.6.2/ext/pdo_mysql
phpize
./configure --with-php-config=/usr/local/php/bin/php-config --with-pdo-mysql=/usr/local/mysql/
make -s
make install
本文章由 http://www.wifidog.pro/2015/01/22/centos-authpuppy.html 整理编辑,转载请注明出处