0. The Nodogsplash project
Nodogsplash offers a simple way to provide restricted access to an internet
connection. It is derived from the codebase of the Wifi Guard Dog project.
Nodogsplash is released under the GNU General Public License.
The following describes what Nodogsplash does, how to get it and run it, and
how to customize its behavior for your application.
1. Overview
Nodogsplash offers a solution to this problem: You want to provide controlled
and reasonably secure public access to an internet connection; and while you
want to require users to give some acknowledgment of the service you are
providing, you don't need or want the complexity of user account names and
passwords and maintaining a separate database-backed authentication server.
When installed and running, Nodogsplash implements a simple 'authentication'
protocol. First, it detects any user attempting to use your internet connection
to request a web page. It captures the request, and instead serves back a
'splash' web page using its own builtin web server. The splash page contains a
link which, when the user clicks on it, opens limited access for them to the
internet via your connection, beginning by being redirected to their originally
requested page. This access expires after a certain time interval.
Nodogsplash also permits limiting the aggregate bandwidth provided to users, if
you don't want to grant all of your available upload or download bandwidth.
Specific features of Nodogsplash are configurable, by editing the configuration
file and the splash page. The default installed configuration may be all you
need, though.
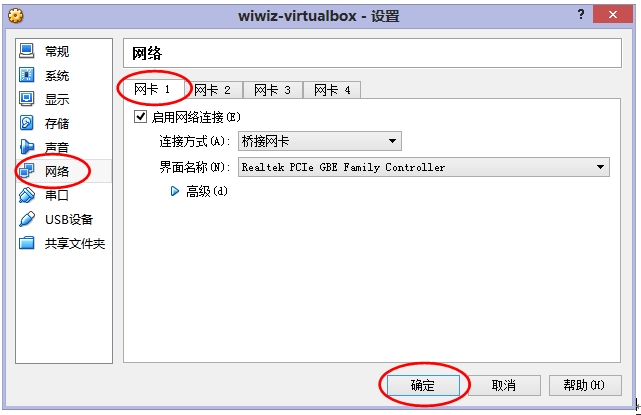
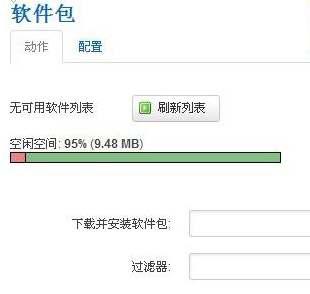
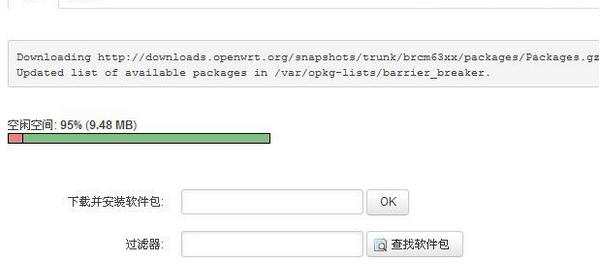
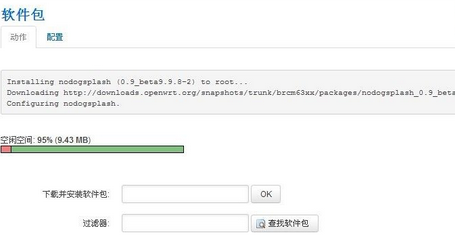
2. Installing and running nodogsplash
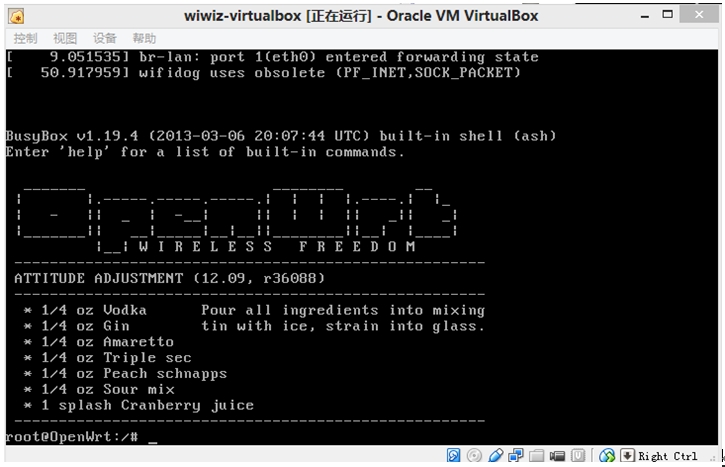
- Have a router working with OpenWrt. Nodogsplash has been compiled against a
OpenWrt Attitude Adjustment buildroot; it may or may not work on other versions
of OpenWrt or on other kinds of Linux-based router firmware. For notes on
using Nodogsplash with OpenWrt Kamikaze, see below.
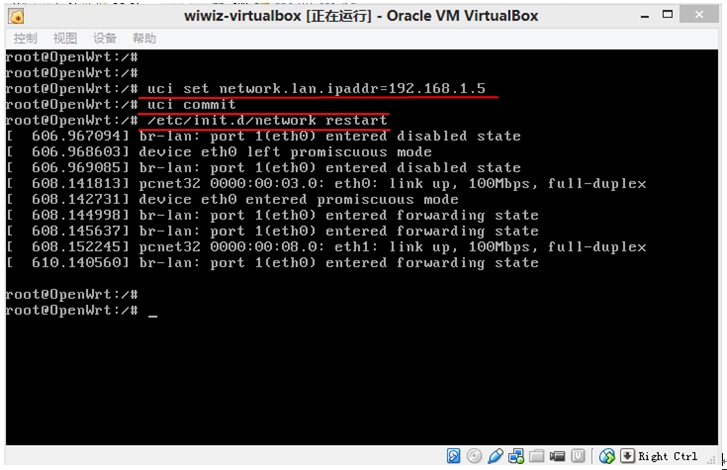
- Make sure your router is basically working before you try to install
nodogsplash. In particular, make sure your DHCP daemon is serving addresses
on the interface that nodogsplash will manage (typically br-lan or eth1), and
for the following use ssh or telnet access to your router over a different
interface.
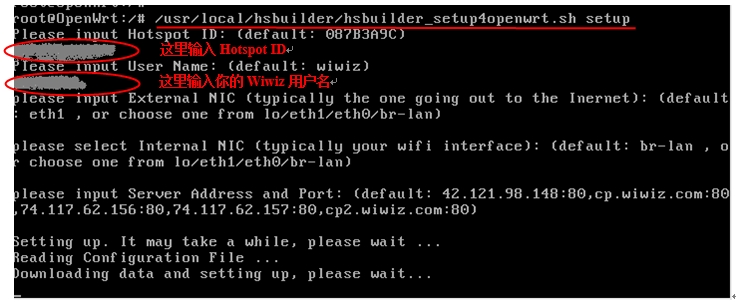
To install nodogsplash, obtain the nodogsplash*.ipk package you want to
install from the project website, copy it to /tmp/ on your OpenWrt router,
and, in as root on the router, run:
ipkg install /tmp/nodogsplash*.ipk
(Note: to prevent installation of an older package, you may have to remove
references to remote package repositories in your ipkg.conf file)
- If the interface that you want nodogsplash to manage is not br-lan,
edit /etc/nodogsplash/nodogsplash.conf and set GatewayInterface.
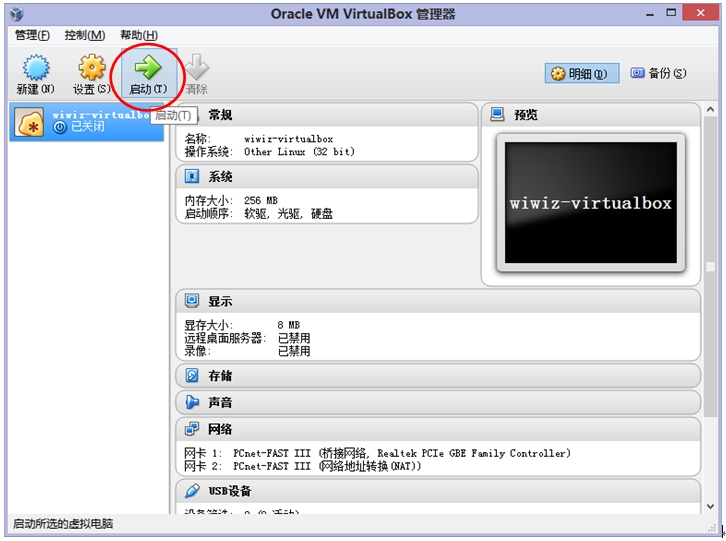
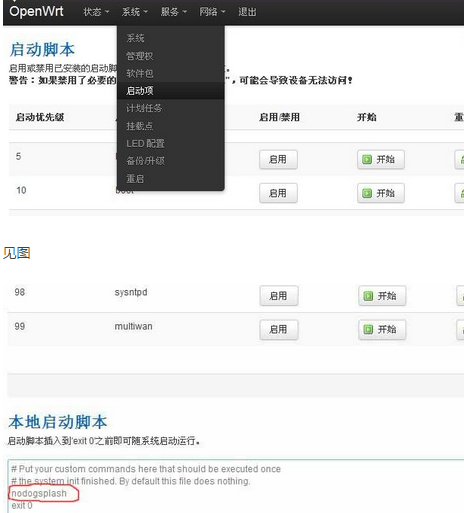
To start nodogsplash, run the following, or just reboot the router:
/etc/init.d/nodogsplash start
To test the installation, connect a client machine to the interface on your
router that is managed by nodogsplash (for example, connect to the router's
wireless lan) and in a browser on that machine, attempt to visit any website.
You should see the nodogsplash splash page instead. Click on the icon; the
browser should redirect to the initially requested website.
To stop nodogsplash:
/etc/init.d/nodogsplash stop
To uninstall nodogsplash:
ipkg remove nodogsplash
3. How nodogsplash works
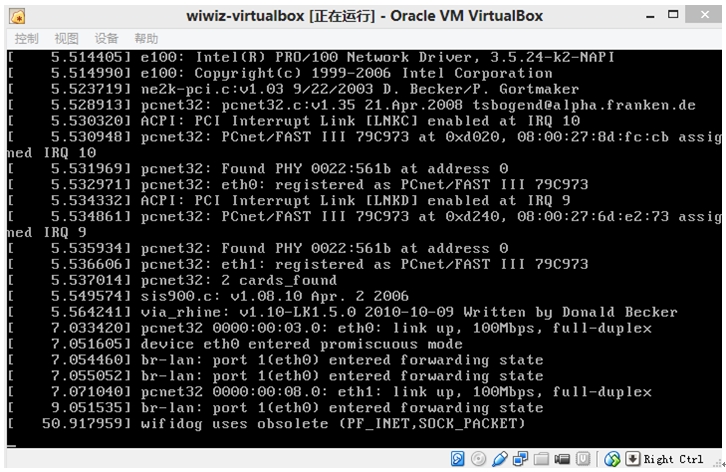
A wireless router running OpenWrt has two or more interfaces; nodogsplash
manages one of them. This will typically be br-lan, the bridge to both the
wireless and wired LAN; or the wireless lan interface may be named something
else if you have broken the br-lan bridge to separate the wired and wireless
LAN's.
3.1 Packet filtering
Nodogsplash considers four kinds of packets coming into the router over the
managed interface. Each packet is one of these kinds:
- Blocked, if the MAC mechanism is block, and the source MAC address of the
packet matches one listed in the BlockedMACList; or if the MAC mechanism
is allow, and source MAC address of the packet does not match one listed
in the AllowedMACList or the TrustedMACList. These packets are dropped.
- Trusted, if the source MAC address of the packet matches one listed in the
TrustedMACList. By default, these packets are accepted and routed to all
destination addresses and ports. If desired, this behavior can be
customized by FirewallRuleSet trusted-users and FirewallRuleSet trusted-
users-to-router lists in the nodogsplash.conf configuration file, or by
the EmptyRuleSetPolicy trusted-users EmptyRuleSetPolicy trusted-users-to-
router directives.
- Authenticated, if the packet's IP and MAC source addresses have gone
through the nodogsplash authentication process and has not yet expired.
These packets are accepted and routed to a limited set of addresses and
ports (see FirewallRuleSet authenticated-users and FirewallRuleSet users-
to-router in the nodogsplash.conf configuration file).
- Preauthenticated. Any other packet. These packets are accepted and routed
to a limited set of addresses and ports (see FirewallRuleSet
preauthenticated-users and FirewallRuleSet users-to-router in the
nodogsplash.conf configuration file). Any other packet is dropped, except
that a packet for destination port 80 at any address is redirected to port
2050 on the router, where nodogsplash's builtin libhttpd-based web server
is listening. This begins the 'authentication' process. The server will
serve a splash page back to the source IP address of the packet. The user
clicking the appropriate link on the splash page will complete the
process, causing future packets from this IP/MAC address to be marked as
Authenticated until the inactive or forced timeout is reached, and its
packets revert to being Preauthenticated.
Nodogsplash implements these actions by inserting rules in the router's
iptables mangle PREROUTING chain to mark packets, and by inserting rules in the
nat PREROUTING, filter INPUT and filter FORWARD chains which match on those
marks. Because it inserts its rules at the beginning of existing chains,
nodogsplash should be insensitive to most typical existing firewall
configurations.
3.2 Traffic control
Nodogsplash also optionally implements basic traffic control on its managed
interface. This feature lets you specify the maximum aggregate upload and
download bandwidth that can be taken by clients connected on that interface.
Nodogsplash implements this functionality by enabling two intermediate queue
devices (IMQ's), one for upload and one for download, and attaching simple
rate-limited HTB qdiscs to them. Rules are inserted in the router's iptables
mangle PREROUTING and POSTROUTING tables to jump to these IMQ's. The result is
simple but effective tail-drop rate limiting (no packet classification or
fairness queueing is done).
4. Customizing nodogsplash
The default shipped configuration is intended to be usable and reasonably
secure as-is for basic internet sharing applications, but it is customizable.
In the configuration file, a FirewallRule has the form:
FirewallRule permission [protocol [port portrange] [to ip]
where
- permission is required and must be allow, block, drop, log, or ulog.
- protocol is optional. If present, it must be tcp, udp, icmp, or all.
Defaults to all.
- port portrange is optional. If present, protocol must be tcp or udp.
portrange can be a single integer port number, or a colon-separated port
range, e.g. 1024:1028. Defaults to all ports.
to ip is optional. If present, ip must be a decimal dotted-quad IP address
with optional mask. Defaults to 0.0.0.0/0, i.e. all addresses.
To change the contents of the splash page, edit the splash page file:
/etc/nodogsplash/htdocs/splash.html
When the splash page is served, the following variables in the page are
replaced by their values:
- $gatewayname The value of GatewayName as set in nodogsplash.conf.
$authtarget A URL which encodes a unique token and the URL of the user's
original web request. If nodogsplash receives a request at this URL, it
completes the authentication process for the client and replies to the
request with a "302 Found" to the encoded originally requested
URL. (Alternatively, you can use a GET-method HTML form to send this
information to the nodogsplash server; see below.) As a simple example:
<a href="$authtarget">Enter</a>
$imagesdir The directory in nodogsplash's web hierarchy where images to be
displayed in the splash page must be located.
- $tok,$redir,$authaction, and $denyaction are also available and can be
useful if you want to write the splash page to use a GET-method HTML form
instead of using $authtarget as the value of an href attribute to
communicate with the nodogsplash server. As a simple example:
<form method='GET' action='$authaction'>
  <input type='hidden' name='tok' value='$tok'>
  <input type='hidden' name='redir' value='$redir'>
  <input type='submit' value='Click Here to Enter'>
</form>
$clientip, $clientmac and $gatewaymac The respective addresses
of the client or gateway. This might be usefull in cases where the data
needs to be forwarded to some other place by the plash page itself.
$nclients and $maxclients User stats. Usefull when you need to
display something like "n of m users online" on the splash site.
$uptime The time Nodogsplash is running.
To change the appearance of informational and error pages which may
occasionally be served by nodogsplash, edit the infoskel file:
/etc/nodogsplash/htdocs/infoskel.html
In this file, variables $gatewayname, $version, $title, and $content will be
replaced by their values. $title is a summary of the information or kind of
error; $content is the content of the information or error message.
5. Authentication
5.1 Site-wide username and password
Nodogsplash can be configured to require a username and/or password to be
entered on the splash page as part of the authentication process. Since the
username and password are site-wide (not per user), and they are sent in the
clear using HTTP GET, this is not a secure mechanism.
To enable this, edit nodogsplash.conf to set parameters PasswordAuthentication,
UsernameAuthentication, Password, Username, and PasswordAttempts as desired.
Then the splash page must use a GET-method HTML form to send user-entered
username and/or password as values of variables nodoguser and nodogpass
respectively, along with others as required, to the server. For example:
  <form method='GET' action='$authaction'>
  <input type='hidden' name='tok' value='$tok'>
  <input type='hidden' name='redir' value='$redir'>
  username: <input type='text' name='nodoguser' value='' size='12' maxlength='12'>
  <br>
  password: <input type='password' name='nodogpass' value='' size='12' maxlength='10'>
  <br>
  <input type='submit' value='Enter'>
  </form>
5.2 Forwarding authentication
Nodogsplash allows to call an external program for authentication using
the options BinVoucher/EnablePreAuth/ForceVoucher in nodogsplash.conf.
The given program for BinVoucher will be called using the clients MAC address as argument.
The output is expected to be the number of seconds the client is to be authenticated.
It may also contain the clients download and upload speed limit in KBits/s.
See the example configuration file for further details.
6. Using ndsctl
A nodogsplash install includes ndsctl, a separate application which provides
some control over a running nodogsplash process by communicating with it over a
unix socket. Some command line options:
To print to stdout some information about your nodogsplash process:
/usr/bin/ndsctl status
To block a MAC address, when the MAC mechanism is block:
/usr/bin/ndsctl block MAC
To unblock a MAC address, when the MAC mechanism is block:
/usr/bin/ndsctl unblock MAC
To allow a MAC address, when the MAC mechanism is allow:
/usr/bin/ndsctl allow MAC
To unallow a MAC address, when the MAC mechanism is allow:
/usr/bin/ndsctl unallow MAC
To deauthenticate a currently authenticated user given their IP or MAC
address:
/usr/bin/ndsctl deauth IP|MAC
To set the verbosity of logged messages to n:
/usr/bin/ndsctl loglevel n
For more options, run ndsctl -h. (Note that if you want the effect of ndsctl
commands to to persist across nodogsplash restarts, you have to edit the
configuration file.)
7. Debugging nodogsplash
- To see maximally verbose debugging output from nodogsplash, edit the
/etc/init.d/nodogsplash file to set the OPTIONS variable to the flags "-s -d 7",
restart or reboot, and view messages with logread. The -s flag logs to
syslog; the -d 7 flag sets level 7, LOG_DEBUG, for debugging messages
(see syslog.h). You don't want to run with these flags routinely, as it will
quickly fill the syslog circular buffer, unless you enable remote logging. A
lower level of logging, for example level 5, LOG_NOTICE, is more appropriate
for routine use (this is the default). Logging level can also be set using
ndsctl as shown above.
Alternatively, you can set the flag -f instead of -s, and restart.
This will run nodogsplash in the foreground, logging to stdout.
- When stopped, nodogsplash deletes its iptables rules, attempting to leave the
router's firewall in its original state. If not (for example, if nodogsplash
crashes instead of exiting cleanly) subsequently starting and stopping
nodogsplash should remove its rules.
Nodogsplash operates by marking packets (and, if traffic control is enabled,
passing packets through intermediate queueing devices). Most QOS packages
will also mark packets and use IMQ's. Therefore one or both of Nodogsplash and
a QOS package may malfunction if used together. Potential conflicts may be
investigated by looking at your overall iptables setup. To check to see all
the rules in, for example, the mangle table chains, run
iptables -t mangle -v -n -L
For extensive suggestions on debugging iptables, see for example Oskar
Andreasson's_tutorial.
本文章由 http://www.wifidog.pro/2015/05/11/nodogsplash%E9%A1%B9%E7%9B%AE%E4%BB%8B%E7%BB%8D.html 整理编辑,转载请注明出处