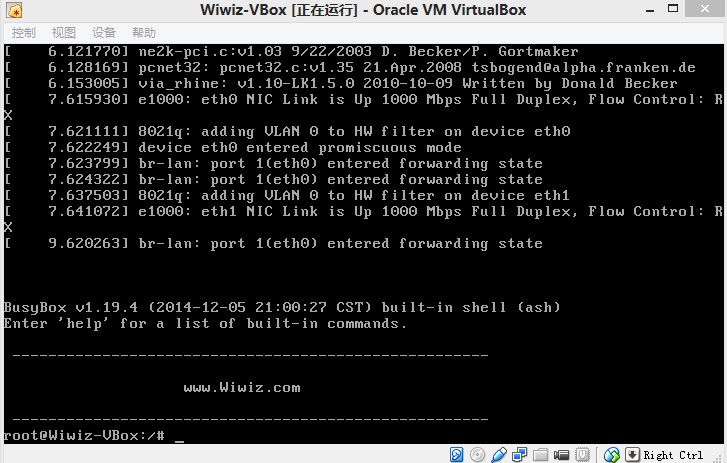
分类 默认分类 下的文章

wifidog 用户第一次访问网络流程图-wifidog原理

通过wifidog实现用户上网强制认证后,用户第一次访问网络的流程大致如下:

1.用户通过浏览器访问某一网页。
2.wifidog重定向用户请求到认证服务器。
3.认证服务器返回登录认证页面给用户。
4.用户输入认证信息并提交。
5.认证通过后,服务器告知路由器放行。
6.用正常上网。

对应流程图如下:
QQ截图20150319091336.png

本文章由 http://www.wifidog.pro/2015/03/19/wifidog%E5%8E%9F%E7%90%86-1.html整理编辑,转载请注明出处

wifidog安装指南HotSpot Builder Utility安装指南 用于安装到Linux系统的计算机

1. 系统需求
硬件

  • 一台带有2个网络接口的计算机
  • 一个无线AP设备(如,无线路由器)

软件

  • Linux操作系统 (推荐ubuntu 8.04或更高)
  • dhcp3-server

如果dhcp3-server还没有安装,你可以手动安装,例如,
在Debian中执行:

sudo apt-get install dhcp3-server 

在Redhat/CentOS中执行:

yum install dhcp

将计算机的一个网络接口连接到Internet。
设置并启用无线网络,即用无线路由器创建一个可用Access Point。
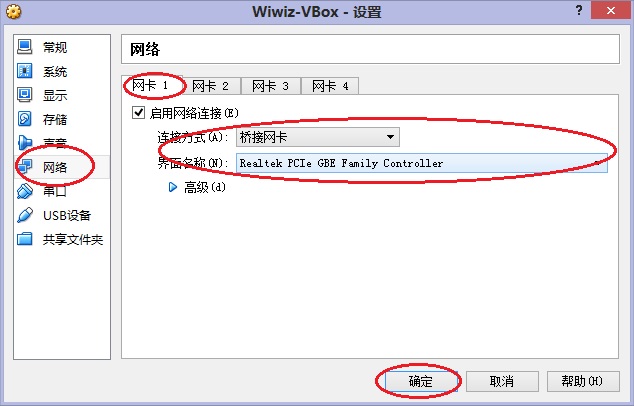
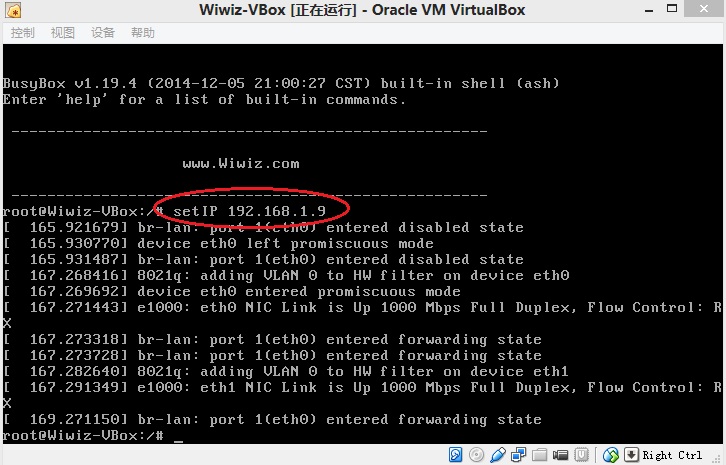
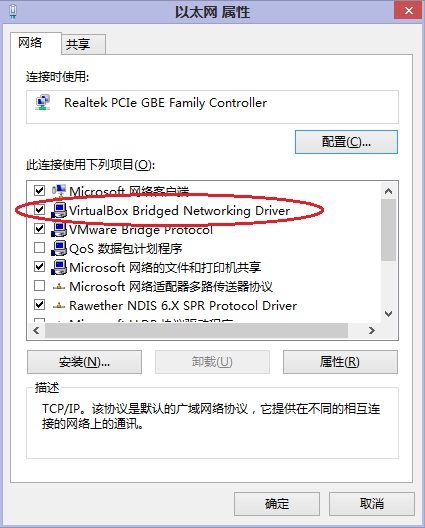
将另一个网络接口(有线的或无线的)连接到(或桥接到)你的无线AP设备以接入无线局域网(WLAN),并且手动设置一个IP。

建议清空iptables/防火墙设置。例如:

/etc/init.d/iptables stop

iptables -t nat -F
iptables -t filter -F
iptables -t mangle -F

注:
当所有的安装设置完成后,你的计算机(而不是无线AP)将充当无线网络的网关的角色。所以,如果你的无线AP设备是一个无线路由器,那么请禁用它的DHCP与UPNP服务。
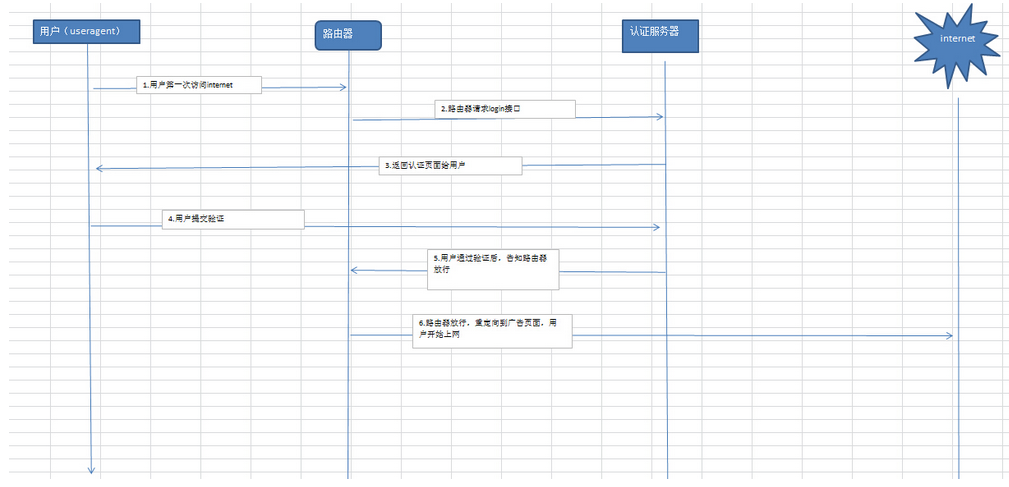
2. 在Web控制面板中创建热点
登录到Web控制面板,访问http://cp.wiwiz.com/as/
点击“我的热点”,在接下来的页面中点击“创建热点”。根据页面的提示完成各项设置,点击保存。
你将会看到你刚创建热点的Hotspot ID。记下它,接下来的步骤将会用到它。

3. 安装与设置Wiwiz HotSpot Builder Utility组件
http://www.wiwiz.com/download/下载最新版的Wiwiz HotSpot Builder Utility。

执行以下命令进行安装:

cd / ; tar -zxf hsbuilder-util-latest.tar.gz
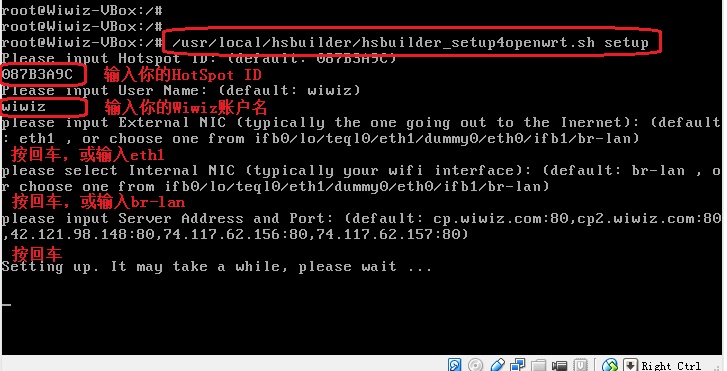
执行以下命令以开始设置:

/usr/local/hsbuilder/hsbuilder_setup.sh setup

然后根据提示完成设置。
然后根据各步提示完成设置。以下是各步提示的说明:

“please select External NIC (typically the one going out to the Inernet):”– 此步请选择接入到Internet的网络接口。

“please select Internal NIC (typically your wifi interface):”– 此步请选择接入到局域网/无线局域网的网络接口。

“please input Hotspot ID:” — 此步请输入你在Wiwiz Web面板中创建的热点的Hotspot ID(不是热点的名称,也不是你的无线网络的SSID)。

“please input User Name:” — 此步请输入你的Wiwiz注册用户名。

“please input Server Address and Port:” — 此步请保持默认值。

“Do you want DHCP service to be configured? If you select No to skip it, you need to configure DHCP service manually later.” — 此步请选择是否让Wiwiz HotSpot Builder Utility自动配置DHCP服务。如果选择是,请继续以下的步骤。

“DHCP Setting: please input Network IP:” — 此步请输入你的局域网/无线局域网的网络IP。例如:192.168.1.0代表的是192.168.1.xxx网段。

“DHCP Setting: please input NET MASK:” — 此步请输入你的局域网/无线局域网的掩码。

“DHCP Setting: please input IP of Gateway (it should be the IP of this machine):” — 此步请输入今后的局域网/无线局域网的网关地址,即这台计算机的Internal NIC的IP地址(一般保留默认值即可)。

“DHCP Setting: please input DNS:” — 此步请输入DNS地址。默认值为程序自动检测到的DNS地址。也可以指定其他可用的DNS地址,推荐指定ISP提供的DNS地址。

“DHCP Setting: please input IP Range of this Network:” — 此步请输入DHCP地址分配范围。一般保留默认值即可。

最后,如果没有报错信息并看到“HSBuilder Setup Completed!”的提示文字,那么安装已经完成了。

注:
当上述过程完成后,如果程序提示警告信息“Warning: DHCP Service starting failed. You need to start it up manually.”,那么说明自动配置和启动DHCP服务失败,请自行手动配置并启动它。

你可以使用一个Wi-Fi客户端(如带WLAN适配器的PC或者支持Wi-Fi的移动电话)测试一下你的热点:

  • 搜索可用Wi-Fi热点,并连接到你的热点。
  • 打开Web浏览器,输入任何一个HTTP开头的网址。如果你的热点的认证页面能够显示出来,就说明你的热点已经正常运转了。

本文章由 http://www.wifidog.pro/2015/03/18/wifidog%E5%AE%89%E8%A3%85%E5%88%B0linux%E8%AE%A1%E7%AE%97%E6%9C%BA.html整理编辑,转载请注明出处

wifidog安装指南HotSpot Builder Utility安装指南

此处以VirtualBox举一个例子。建议你从http://www.wiwiz.com/zh/download/下载并使用我们提供的虚拟机镜像。它包含了所有必要的软件包,并且被很好的配置了,这样可以节约你很多时间。

系统需求

硬件

  • 一台带有1个以太网卡的电脑(宿主机)
  • 一个无线路由器

软件

准备工作

  1. 准备一个无线路由器,连接并设置好Internet连接,设置好无线局域网。
  2. 用网线连接电脑的网卡与无线路由器的LAN口。
  3. 把电脑网卡设置为静态IP,而不要用自动获得IP的方式,并确保电脑可以正常访问Internet。
  4. 关闭路由器的DHCP服务,确保网络中没有其他的DHCP服务运行(重要)。
  5. 建议关闭宿主机的防火墙。

安装与设置
1. 启动VirtualBox,导入我们的虚拟机镜像文件Wiwiz-VBox.ova,参考下图:
wiwizvbox-cn01.jpg

wiwizvbox-cn02.jpg

wiwizvbox-cn03.jpg

2. 导入后,会显示以下界面。然后,点击“设置”。
wiwizvbox-cn04.jpg

3. 确认网络设置。确保“网卡1”的连接方式必须是“桥接网卡”。如果电脑有多块网卡,那么,“界面名称”项务必要选择用网线连接路由器的网卡(重要)。网卡2、网卡3、网卡4的设置不要修改。
wiwizvbox-cn05.jpg

4. 然后,点击“启动”,运行虚拟机。
wiwizvbox-cn06.jpg

之后,你会看到以下的虚拟机运行界面:
wiwizvbox-cn07.jpg

稍等片刻后,待系统启动完毕,按一下回车键,就会进入到命令行界面,如下图。
wiwizvbox-cn08.jpg

5. 设置IP地址。输入以下命令:
setIP 192.168.1.9

注意:setIP命令后面的参数值是要给虚拟机设置的内网IP地址,它应和你的路由器内网网段是一致的,并且是一个没被占用的IP地址。例如,如果你的路由器网段是192.168.1.x,那么,IP可以是192.168.1.9。
wiwizvbox-cn09.jpg

6. 测试网络,确保在虚拟机内可以ping通路由器和外网地址(重要)。比如:
ping 192.168.1.1 #请将192.168.1.1替换为你的路由器的实际IP地址
ping baidu.com
如都能ping通,那么继续下一步,否则,请仔细检查确认之前的操作步骤。

7. 执行以下命令:
/usr/local/hsbuilder/hsbuilder_setup4openwrt.sh setup
然后,按照提示输入HotSpot ID和你的Wiwiz用户名,其他的项目都按回车即可。
如果你还没有Wiwiz用户名或HotSpot ID,那么请访问Wiwiz Web面板(http://cp.wiwiz.com)注册一个账户,登陆并创建一个热点即可得到HotSpot ID。
wiwizvbox-cn10.jpg

之后,等待片刻,如果没有报错信息并看到“HSBuilder Setup Completed!”的提示文字,那么安装就完成了。

最后,你可以使用一个WiFi终端设备(如带WLAN适配器的PC或者支持Wi-Fi的移动电话)测试一下你的热点:

  • 搜索并连接到你的热点。
  • 打开Web浏览器,输入任何一个HTTP开头的网址。如果你的热点的认证页面能够显示出来,就说明你的热点已经正常运转了。

常见问题:
1. 安装设置后,在WiFi终端设备里可以正常打开各网站页面,但是并不能显示认证页面。
解决方法:关闭路由器的DHCP服务,确保网络中没有其他的DHCP服务运行。然后,重启虚拟机。

2. 出现“Error Code: 4”的报错信息。
解决方法:确保在虚拟机内可以访问(ping通)路由器和外网地址。建议关闭宿主机的防火墙,并确保使用官方版本的VirtualBox程序,且安装正常。

3. VirtualBox的虚拟机的网络设置中,网卡1的“界面名称”项目里找不到需要桥接的有线网卡。
解决方法:确保宿主机的有线网卡的属性里已勾选了“VirtualBox Bridged Networking Driver”项。如下图:
wiwizvbox-cn11.jpg

本文章由 http://www.wifidog.pro/2015/03/18/wifidog%E5%AE%89%E8%A3%85%E6%8C%87%E5%8D%97.html整理编辑,转载请注明出处

wifidog自动升级固件

一些组织机构运行wifidog时,会在不同的位置有许多接入点。当需要升级固件时,最痛苦的就是在所有的热点逐个升级。最好是热点能够在获取新版本固件时自动升级。
以下内容描述了如何配置固件才能让它自动升级。

前提条件

  • 以下内容假定了如何编辑固件的自定义镜像
  • 接入一个网站当做是自定义存储库。这个库将包含自定义固件图像和自定义包版本的目录。

编辑
假定BUILD_ROOT是openwrt镜像生成器的根目录
将自定义文件添加到镜像,在BUILE_ROOT创建一个新的名为files的目录。

  • 创建一个包含镜像编码的文件

    cd files
    mkdir etc
    cd etc
    touch custom_compil

现在编辑custom_compil文件包含自定义镜像版本
   
   1

  • 添加配置文件来保存自定义升级脚本的配置选项。从BUILD_ROOT/files目录

    mkdir etc/config
    cd etc/config
    touch customupgrade.conf

用以下信息编辑customupgrade.conf

# Config file for custom configuration options for the auto-upgrade script
# All options are defined with default values in the script

# custom_file : default /etc/custom_compil
# Specifies the file on the router that contains the number of the custom compilation of this image
# 
custom_file /etc/custom_compil

# temp_file : default /tmp/latest
# The temporary file to which to download the 'latest' file from the server
# Default value should do usually, unless the tmp directory is somewhere else
# temp_file /tmp/latest

# server 
# MANDATORY
# The web server root where the 'latest' file, and 'package-list' files are kept
server http://wifidog.testserver/files/

# filename : default latest
# The name of the file on the server containing the information on the latest image
#
filename latest

# packagelist : default packages-list
# The name of the file on the server containing the information on the package 
# versions that should be installed on the server
packagelist packages-list

# temp_package: default /tmp/packages-list
# The temporary file to which will be downloaded the packages list file from the server
# Default value should do usually
# temp_package /tmp/packages-list
  • 添加脚本来检测镜像和程序包的更新。从BUILD_ROOT/files目录

    mkdir usr
    mkdir usr/bin
    cd usr/bin
    touch customupgrade
    a+x customupgrade

用以下脚本编辑customupgrade

#!/bin/sh
#
# This script verifies if a new firmware is available on the server
# It supposes that a file on the machine exists in /etc/custom_compil.txt containing
# the custom firmware's version.  On the server, a file named "latest" contains the compil
# number of the latest firmware

CUSTOM_FILE=/etc/custom_compil.txt
TEMP_FILE=/tmp/latest
SERVER=http://wifidog.testserver/files/
FILENAME=latest
PACKAGELIST=packages-list
TEMP_PACKAGE=/tmp/packages-list

CONF_FILE=/etc/config/customupgrade.conf

# Overwrite the default values with the config if necessary
if egrep -v '^#.*' "$CONF_FILE" | grep 'custom_file'; then
        CUSTOM_FILE=$(egrep -v '^#.*' "$CONF_FILE" | grep 'custom_file' | awk '{print $2}')
fi
if egrep -v '^#.*' "$CONF_FILE" | grep 'temp_file'; then
        TEMP_FILE=$(egrep -v '^#.*' "$CONF_FILE" | grep 'temp_file' | awk '{print $2}')
fi
if egrep -v '^#.*' "$CONF_FILE" | grep 'server'; then
        SERVER=$(egrep -v '^#.*' "$CONF_FILE" | grep 'server' | awk '{print $2}')
fi
if egrep -v '^#.*' "$CONF_FILE" | grep 'filename'; then
        FILENAME=$(egrep -v '^#.*' "$CONF_FILE" | grep 'filename' | awk '{print $2}')
fi
if egrep -v '^#.*' "$CONF_FILE" | grep 'packagelist'; then
        PACKAGELIST=$(egrep -v '^#.*' "$CONF_FILE" | grep 'packagelist' | awk '{print $2}')
fi
if egrep -v '^#.*' "$CONF_FILE" | grep 'temp_package'; then
        TEMP_PACKAGE=$(egrep -v '^#.*' "$CONF_FILE" | grep 'temp_package' | awk '{print $2}')
fi

# Verify is a new firmware upgrade is available on the server
if [ -f $CUSTOM_FILE ]; then
        ACTUAL=$(cat $CUSTOM_FILE)

        if [ -f $TEMP_FILE ]; then
                rm $TEMP_FILE
        fi
        wget -O $TEMP_FILE $SERVER$FILENAME

        if [ -f $TEMP_FILE ]; then
                cat $TEMP_FILE | grep 'version' | cut -d: -f2 | awk '{print $1}'
                LATEST=$(cat $TEMP_FILE | grep 'version' | cut -d: -f2 | awk '{print $1}')
                LATESTIMG=$(cat $TEMP_FILE | grep 'file' | cut -d: -f2 | awk '{print $1}')
                MD5SUM=$(cat $TEMP_FILE | grep 'md5sum' | cut -d: -f2 | awk '{print $1}')
        fi

        if [ $LATEST -gt $ACTUAL ]; then
                wget -O "/tmp/"$LATESTIMG $SERVER$LATESTIMG
                ACTUALMD5=$(md5sum "/tmp/"$LATESTIMG | awk '{print $1}')
                if [ $MD5SUM = $ACTUALMD5 ]; then
                        sysupgrade "/tmp/"$LATESTIMG
                fi
        fi
fi

# If we get here in the script, then no new firmware was installed, we check for new packages

# First, verify if the custom package repository is in the opkg.conf file
#
# If you do not plan to have one such directory on your server, you may comment out
# the following lines
#
REPO=$(grep "$SERVER" /etc/opkg.conf)
if [ -z "$REPO" ]; then
        echo "src custom_pack "$SERVER"packages" >> /etc/opkg.conf
fi

# update the package repository to get all the latest versions
opkg update

# Download the packages-list file from the custom server.  
# This file is such that for each line contains the package name and version to be installed 
# example: 
#
# wifidog 1.1.5-1
# ntp 2.1-1
#
# Only those packages will be installed if the version is different from the one currently installed
if [ -f $TEMP_PACKAGE ]; then
        echo "removing file "$TEMP_PACKAGE
        rm $TEMP_PACKAGE
fi

wget -O $TEMP_PACKAGE $SERVER$PACKAGELIST

if [ -f $TEMP_PACKAGE ]; then
        cat $TEMP_PACKAGE | while read line; do
                PACKAGE=$(echo $line | cut -f1,2 | awk '{print $1}')
                VERSION=$(echo $line | cut -f1,2 | awk '{print $2}')
                if opkg status $PACKAGE | grep 'Version' | grep $VERSION > /dev/null; then
                        echo "package "$PACKAGES" "$VERSION" is already installed"
                else
                        echo "installing package "$PACKAGE
                        opkg install $PACKAGE
                fi              
        done
fi 
  • 现在我们需要添加一个定时任务来运行这个脚本。每天或根据所需的作何时候运行。从BUILD_ROOT/files目录

    cd etc
    mkdir crontabs
    cd crontabs
    touch root

编辑root文件包含所需的定时任务

# /etc/crontab/root:  Cron job to be run on custom openwrt firmware

# m h   dom mon dow command
*   2   *   *   *   /usr/bin/customupgrade > /tmp/custom.log

本文章由 http://www.wifidog.pro/2015/03/13/wifidog%E8%87%AA%E5%8A%A8%E5%8D%87%E7%BA%A7%E5%9B%BA%E4%BB%B6.html 整理编辑,转载请注明出处