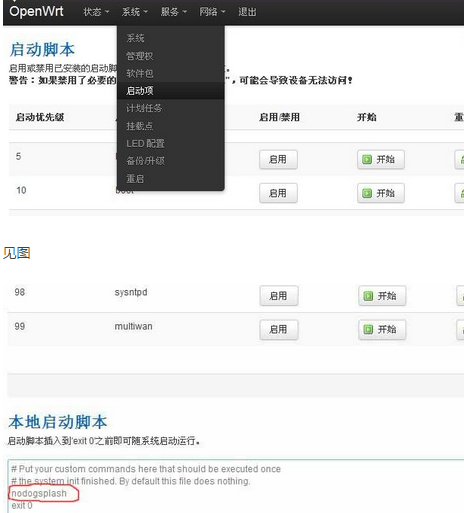
标签 nodogsplash openwrt 下的文章

nodogsplash在指定网络下工作

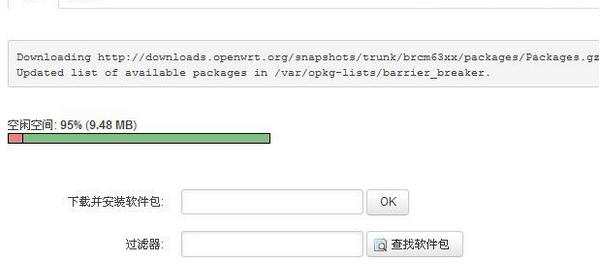
nodogsplash是附加于openwrt的WIFI热点认证程序,工作在路由器下的局域网内,接管路由器上多个热点的认证服务。

nodogsplash是修改的wifidog,不需要服务器,配置简单,轻巧方便。
openwrt的路由器只有一个,测试中打开nodogsplash会耽误其他人上网。
所以单独开启一个热点来使用nodogsplash。

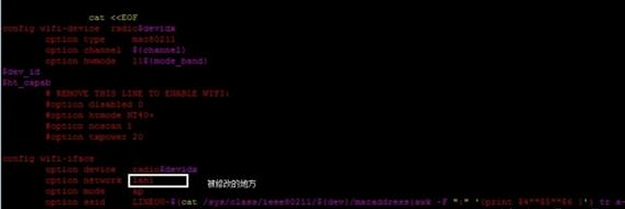
vim /etc/config/wireless


#加入热点
config wifi-iface
    option device    radio1
    option network    lan1
    option ifname    ath1
    option mode    ap
    option ssid    NoDog


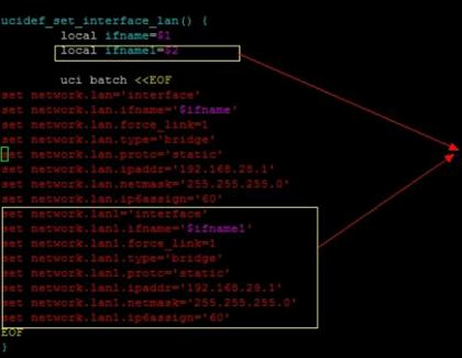
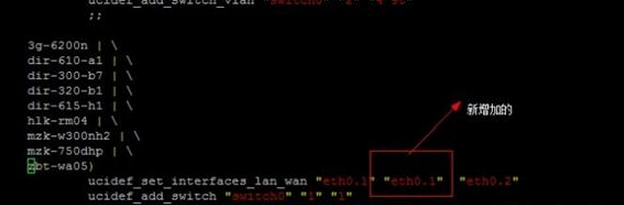
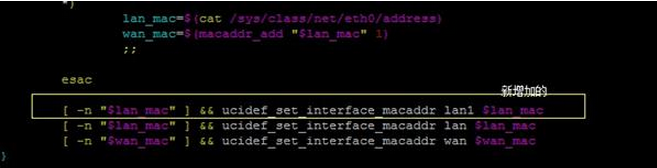
vim /etc/config/network

#修改network的配置
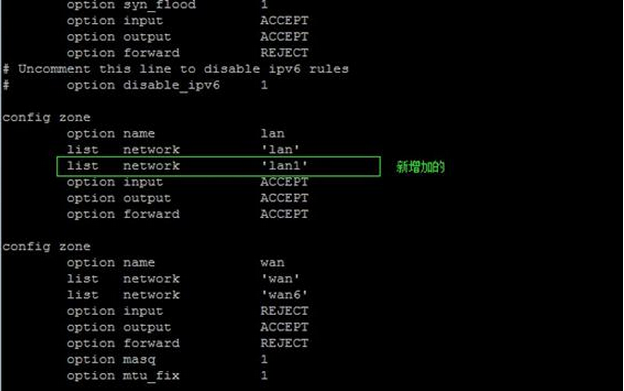
config 'interface' 'lan1'
option 'ifname' 'ath1'
option 'proto' 'static'
option 'macaddr' '12:34:56:78:90:ab'
option 'ipaddr' '192.168.9.1'
option 'netmask' '255.255.255.0'


vim /etc/config/dhcp

#加入dhcp
config dhcp lan1
option interface lan1
option start 100
option limit 150
option leasetime 12h


vim /etc/nodogsplash/nodogsplash.conf
#修改Gateway
GatewayInterface ath1


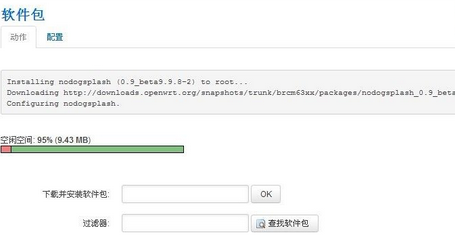
/etc/init.d/nodogsplash restart

本文章由 http://www.wifidog.pro/2015/05/22/nodogsplash%E8%AE%A4%E8%AF%81.html 整理编辑,转载请注明出处

Installing and running nodogsplash in openwrt

Have a router working with OpenWrt. Nodogsplash has been compiled against a OpenWrt Attitude Adjustment buildroot; it may or may not work on other versions of OpenWrt or on other kinds of Linux-based router firmware. For notes on using Nodogsplash with OpenWrt Kamikaze, see below.
Make sure your router is basically working before you try to install nodogsplash. In particular, make sure your DHCP daemon is serving addresses on the interface that nodogsplash will manage (typically br-lan or eth1), and for the following use ssh or telnet access to your router over a different interface.
To install nodogsplash, obtain the nodogsplash*.ipk package you want to install from the project website, copy it to /tmp/ on your OpenWrt router, and, in as root on the router, run:

ipkg install /tmp/nodogsplash*.ipk

(Note: to prevent installation of an older package, you may have to remove references to remote package repositories in your ipkg.conf file)

If the interface that you want nodogsplash to manage is not br-lan, edit /etc/nodogsplash/nodogsplash.conf and set GatewayInterface.
To start nodogsplash, run the following, or just reboot the router:

/etc/init.d/nodogsplash start

To test the installation, connect a client machine to the interface on your router that is managed by nodogsplash (for example, connect to the router's wireless lan) and in a browser on that machine, attempt to visit any website. You should see the nodogsplash splash page instead. Click on the icon; the browser should redirect to the initially requested website.

To stop nodogsplash:

/etc/init.d/nodogsplash stop

To uninstall nodogsplash:

ipkg remove nodogsplash

本文章由 http://www.wifidog.pro/2015/05/06/openwrt-install-nodogsplash.html 整理编辑,转载请注明出处

openwrt安装wifi弹出广告教程(nodogsplash)

1.设置openwrt内部的dns服务器地址,方便openwrt更新软件包(openwrt能更新软件包就不需要这一步)
1.png

2.在“系统”菜单下点击“软件包”进入,点“刷新列表”按钮
2.png

3.png

其状态变为
4.png

3.在“下载并安装软件包”的空中输入“nodogsplash”,点击“ok”,出现“configuring nodogsplash"的字样表示安装成功
5.png

4.用winscp或SecureCRT登录路由器,可以看到在”/etc“目录下已经有”nodogsplash“的目录,目录下有一个文件nodogsplash.conf和一个目录htdocs,
其中nodogsplash.conf是配置文件,htdocs目录是wifi或局域网认证时弹出web页面的存放地方,splash.html文件为弹出的首页,images文件夹为web页面用到的图片存放地(当然,大家可以随便存放主页了,除了首页的文件名要改成splash.html外)

5.将附件中的文件解压覆盖方式上传到/etc/nodogsplash目录下

6.将nodogsplash加入到启动项,点击“系统”----“启动项”,将"nodogsplash"加到“exit 0”前面

6.png

7.winscp或SecureCRT中可以用ndsctl命令:ndsctl status(看状态)、ndsctl stop(服务停止)等

本文章由 http://www.wifidog.pro/2015/05/05/openwrt%E5%AE%89%E8%A3%85nodogsplash-1.html 整理编辑,转载请注明出处

openwrt有线lan口不经过nodogsplash认证仅wifi认证方法

openwrt有线lan口不经过nodog认证,仅wifi认证方法。2,重启nodog。方法二:2,修改无线默认配置,使其网络为新的lan1。3,修改防火墙默认配置,修新增的lan1的防火墙区为lan区。4,修改dhcp默认配置,使lan1开启dhcp。
openwrt有线lan口不经过nodog认证,仅wifi认证方法
经测试,方法一没有成功,所以我花了一天的时候,研究出了方法二
方法一:
1,修改nodogsplash.conf文件,把GatewayInterfacebr-lan中的br-lan改成无线设备名,比如ra0\radio0\wlan0等;
2,重启nodog
方法二:
1,添加lan口接口,命令为lan1:
vim ./package/base-files/files/lib/functions/uci-defaults.sh
uci-default.png

vim target/linux/ramips/base-files/etc/uci-defaults/02_network
02_network.png

02_network_2.png

2,修改无线默认配置,使其网络为新的lan1
vim package/kernel/mac80211/files/lib/wifi/mac80211.sh
mac80211.png

3,修改防火墙默认配置,修新增的lan1的防火墙区为lan区
vim package/network/config/firewall/files/firewall.config
firewall-config.png

4,修改dhcp默认配置,使lan1开启dhcp
vim package/network/services/dnsmasq/files/dhcp.conf
dhcp.conf.png

5,修改nodogplash默认配置,但其网络接口为br-lan1
vimbuild_dir/target-mipsel_24kec+dsp_uClibc-0.9.33.2/nodogsplash-0.9_beta9.9.8/resources/nodogsplash.conf
nodogsplash.conf.png

本文章由 http://www.wifidog.pro/2015/04/27/nodogsplash-openwrt%E4%B8%8D%E8%AE%A4%E8%AF%81%E6%9C%89%E7%BA%BF.html 整理编辑,转载请注明出处