标签 wifidog认证 wifidog安装 wifidog原理 wifidog分析 wifidog配置 wifidog流程 wifidog服务器 wifidog-ddwrt wifidog openwrt 下的文章

公共场所wifi认证解决方案wifidog+authpuppy(1)

服务器:ubuntu 14.04 + authpuppy
路由器:MERCURY MW4530R + wifidog

一、安装authpuppy服务端验证
1、 安装php开发环境:

sudo apt-get install apache2 php5-mysql libapache2-mod-php5 mysql-server

2、 启用apache rewrite,否则会出现(Therequested URL /install/3 was not found on this server.)错误

sudo a2enmod rewrite

3、 到https://launchpad.net/authpuppy 下载最新源码authpuppy-1.0.0-stable,解压并剪切到/var/www/html/authpuppy目录

sudo mv authpuppy /var/www/html/authpuppy

4、 为authpuppy赋予权限

chmod 777 /var/www/html/authpuppy/ -R

5、 修改/etc/apache2/sites-enabled/000-default.conf替换所有内容

sudo gedit /etc/apache2/sites-enabled/000-default.conf

如下:

<VirtualHost *:80>
       ServerAdmin webmaster@localhost
       ServerName authpuppy.localhost
       ServerAlias authpuppy.test

       DocumentRoot /var/www/html/authpuppy/web
       DirectoryIndex index.php
       <Directory /var/www/html/authpuppy/web/>
               Options Indexes FollowSymLinks MultiViews
               AllowOverride All
               Order allow,deny
               allow from all
       </Directory>

       Alias /sf /var/www/html/authpuppy/lib/vendor/symfony/data/web/sf
       <Directory "/var/www/html/authpuppy/lib/vendor/symfony/data/web/sf">
               AllowOverride All
               Allow from All
       </Directory>

       #ErrorLog /var/log/apache2/authpuppy/error.log

       # Possible values include: debug, info, notice, warn, error, crit,
       # alert, emerg.
       LogLevel warn

       #CustomLog /var/log/apache2/authpuppy/access.log combined

  </VirtualHost>

6、 重启apache

sudo service apache2 restart

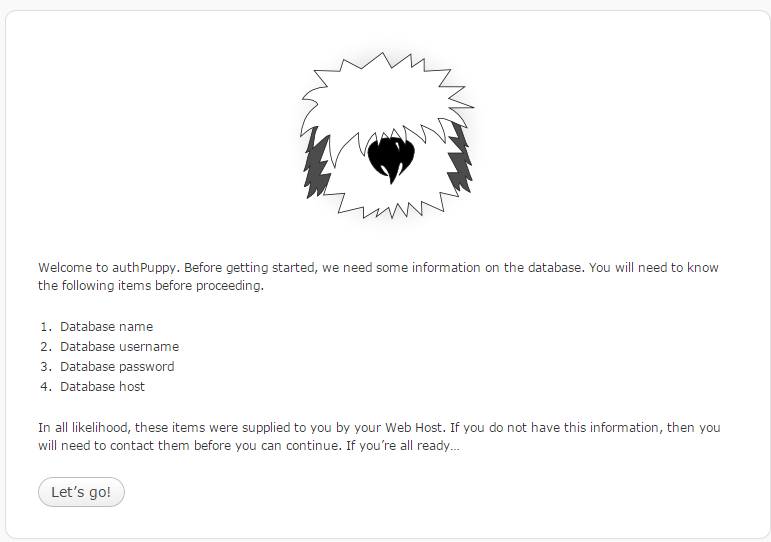
7、访问http://localhost 出现authpuppy配置页面
1.png

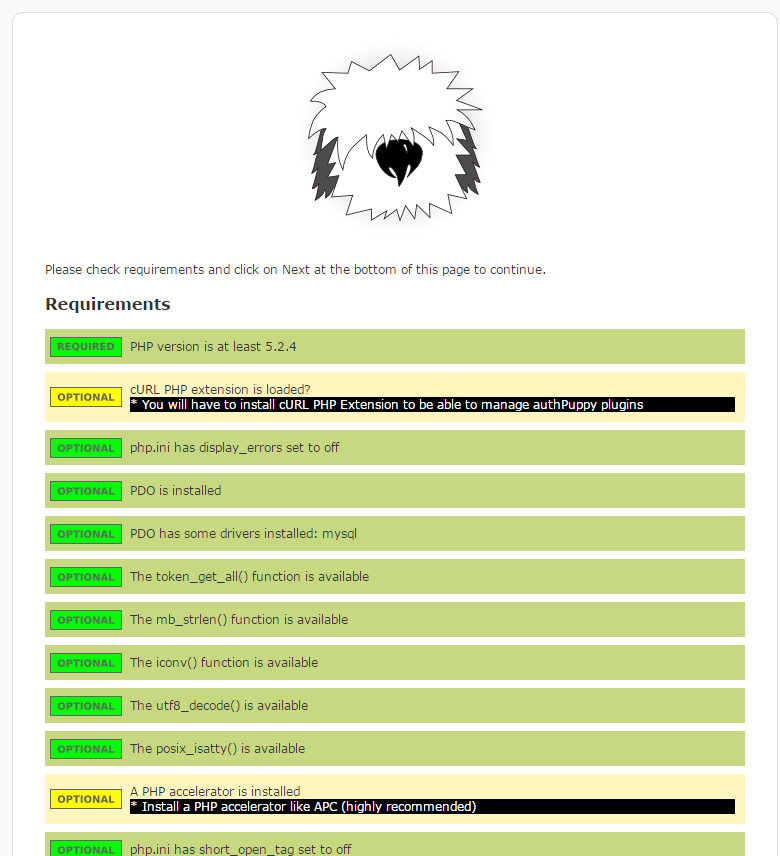
8、 点击下一步继续,这一步会检测系统的环境是否满足authpuppy的要求,不满足的会显示红色,按要求配置好就可以点击下一步了。
2.png

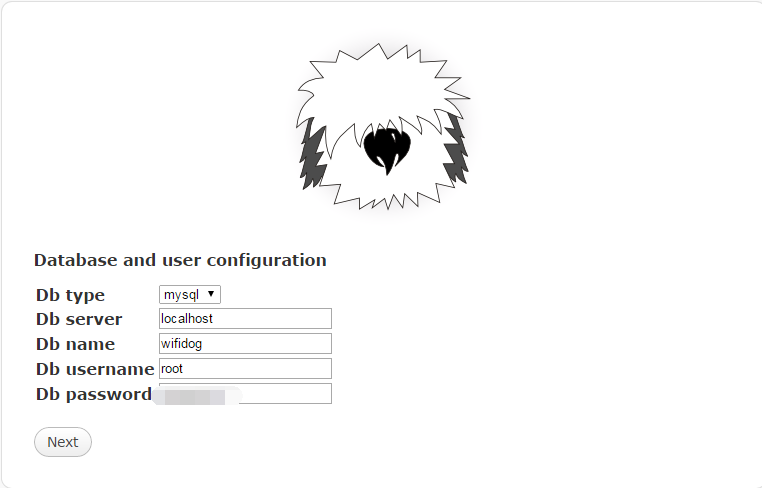
9、创建数据库wifidog,并填写数据库名字、账号密码等信息,此处为了方便,使用root登录,读者可以新建一个user用于访问。
3.png

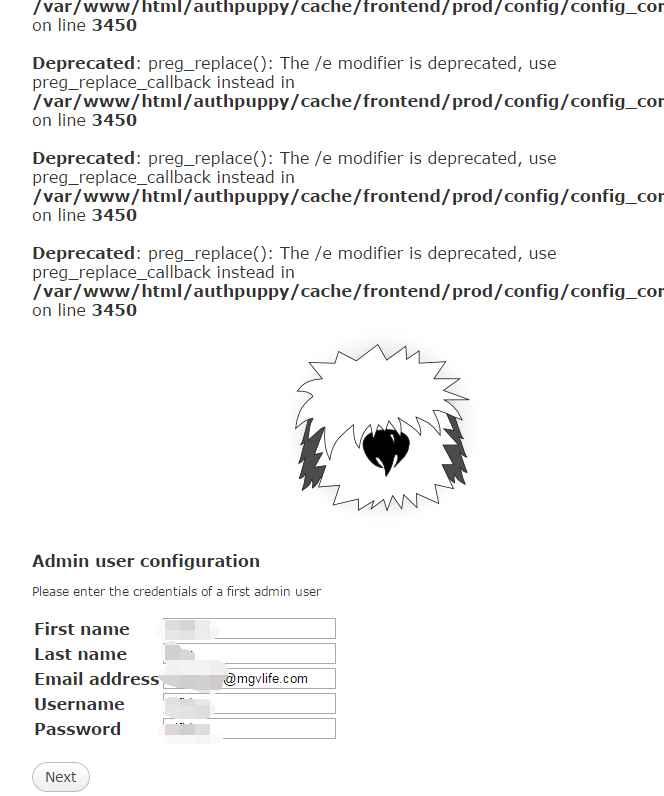
10、一直点击下一步,直到出现管理员用户配置页面,配置用户信息:
4.png

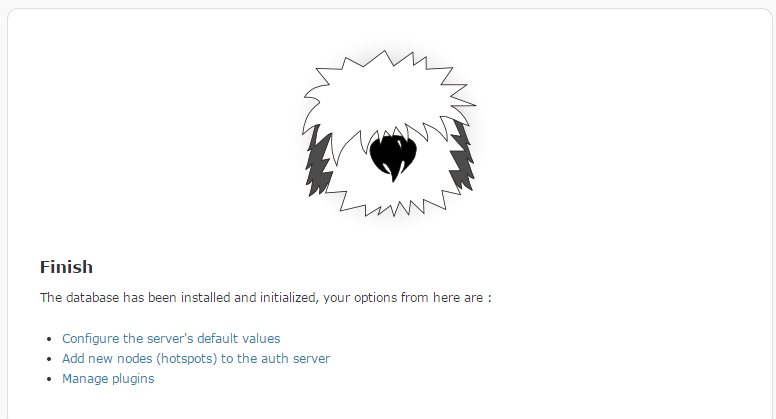
11、 最后配置成功,出现如下页面,此时authpuppy的基本配置完成:
5.png

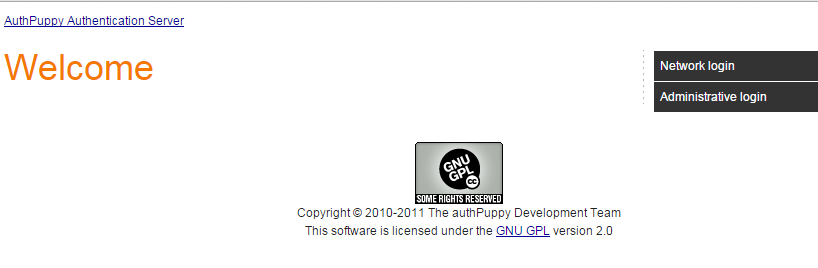
12、以后再次访问http://localhost,就会出现如下页面,不需要重新配置了:
6.png

本文章由 http://www.wifidog.pro/2015/02/26/wifidog-authpuppy%E5%AE%89%E8%A3%85-1.html 整理编辑,转载请注明出处

install AuthPuppy On OpenWRT with Lighttpd

  1. Install OpenWRT on an X86 platform.
    Following the instructions here (http://blog.ich8.com/post/4494), which could install a clean installtion of OpenWRT on an x86 platform with version 14.03.

  2. Setup LAMP
    It has been a while that the default sources on OpenWRT is wrong, that the offical sources has re-archit the directories. Here are some instructions.

2.1 Base part

source: http://downloads.openwrt.org/barrier_breaker/14.07/x86/generic/packages/base/
package list: libexpat libgd libjpeg libncurses libncursesw libopenssl libpcre libpng libpthread libreadline librt iptables-mod-extra iptables-mod-nat-extra

Note after install libpcre, system may not find the proper libpcre.so.0, just make a soft link from libpcre.so.1 in /usr/lib will make it work.

2.2 Lighttpd

source: http://downloads.openwrt.org/barrier_breaker/14.07/x86/generic/packages/packages/

package list: lighttpd lighttpd-mod-access lighttpd-mod-alias lighttpd-mod-cgi lighttpd-mod-fastcgi lighttpd-mod-rewrite

2.3 MySQL

source: http://downloads.openwrt.org/barrier_breaker/14.07/x86/generic/packages/oldpackages/

package list: mysql-server libmysqlclient

2.4 PHP

source: http://downloads.openwrt.org/barrier_breaker/14.07/x86/generic/packages/oldpackages/

package list: php5 php5-cgi php5-fastcgi php5-mod-apc php5-mod-gd php5-mod-mysql php5-mod-pdo php5-mod-pdo-mysql php5-mod-xml

  1. Setup PHP
    Modify /etc/php.ini. First make the doc_root empty, and then modify the max-memory size from 8MB to a much larger one.

  2. Setup Lighttpd
    4.1 Enable some plugins in Lighttpd following this page (http://wiki.openwrt.org/doc/howto/lamp)
    4.2 Enbale mod_rewrite which is used in AuthPuppy
    4.3 !IMPORTANT Migrate the rewrite rules in AuthPuppy’s .htaccess to url.rewrite part, like below:

    url.rewrite-once = (".php$" => "$0", ".html$" => "$0", "^$" => "index.html", "^([^.]+)($|\?.*$)" => "index.php/$1$2")

  3. Now you can install authpuppy and wifidog as usual.

It is much easier to record than try to make it.

本文章由 http://www.wifidog.pro/2015/02/26/openwrt-%E5%AE%89%E8%A3%85-wifidog%E8%AE%A4%E8%AF%81%E6%9C%8D%E5%8A%A1%E5%99%A8authpuppy.html 整理编辑,转载请注明出处

wifidog认证服务器authpuppy 安装检测环境失败

安装authpuppy ,做环境检测时报错如下:

[root@authppy src]# php check_configuration.php 
********************************
*                              *
*  symfony requirements check  *
*                              *
********************************

php.ini used by PHP: /usr/local/Zend/etc/php.ini

** WARNING **
*  The PHP CLI can use a different php.ini file
*  than the one used with your web server.
*  If this is the case, please launch this
*  utility from your web server.
** WARNING **

** Mandatory requirements **

  OK        PHP version is at least 5.2.4 (5.2.17)

** Optional checks **

[[WARNING]] PDO is installed: FAILED
            *** Install PDO (mandatory for Propel and Doctrine) ***
[[WARNING]] PHP-XML module is installed: FAILED
            *** Install and enable the php-xml module (required by Propel) ***
[[WARNING]] XSL module is installed: FAILED
            *** Install and enable the XSL module (recommended for Propel) ***
  OK        The token_get_all() function is available
[[WARNING]] The mb_strlen() function is available: FAILED
            *** Install and enable the mbstring extension ***
  OK        The iconv() function is available
  OK        The utf8_decode() is available
[[WARNING]] The posix_isatty() is available: FAILED
            *** Install and enable the php_posix extension (used to colorized the CLI output) ***
[[WARNING]] A PHP accelerator is installed: FAILED
            *** Install a PHP accelerator like APC (highly recommended) ***
[[WARNING]] php.ini has short_open_tag set to off: FAILED
            *** Set it to off in php.ini ***
[[WARNING]] php.ini has magic_quotes_gpc set to off: FAILED
            *** Set it to off in php.ini ***
  OK        php.ini has register_globals set to off
  OK        php.ini has session.auto_start set to off
  OK        PHP version is not 5.2.9

解决方法:
安装php 模块及一些软件包:

[root@authppy src]# yum install -y libxslt libxslt-devel  php-pdo php-xml php-mbstring php-process

关闭php 相应参数:

[root@authppy src]# vi /usr/local/php/etc/php.ini
short_open_tag = Off
magic_quotes_gpc = Off

错误ARC 的解决方法:

[root@authppy src]# wget http://pecl.php.net/get/APC-3.1.13.tgz
[root@authppy src]# tar zxf APC-3.1.13.tgz 
[root@authppy src]# cd APC-3.1.13
[root@authppy APC-3.1.13]# phpize
Configuring for:
PHP Api Version:         20090626
Zend Module Api No:      20090626
Zend Extension Api No:   220090626
[root@authppy APC-3.1.13]# ./configure --enable-apc
[root@authppy APC-3.1.13]# make
[root@authppy APC-3.1.13]# make install
[root@authppy APC-3.1.13]# ls /usr/lib64/php/modules/
apc.so  curl.so  fileinfo.so  json.so  phar.so  zip.so
[root@authppy src]# echo "apc__extension=/usr/lib64/php/modules/apc.so" >> /usr/local/php/etc/php.ini
[root@authppy src]#ln -s /usr/lib64/php/modules/apc.so /usr/lib/

本文章由 http://www.wifidog.pro/2015/02/26/wifidog%E8%AE%A4%E8%AF%81%E6%9C%8D%E5%8A%A1%E5%99%A8authpuppy%E5%AE%89%E8%A3%85%E5%A4%B1%E8%B4%A5.html 整理编辑,转载请注明出处

ubuntu10.04 安装authpuppy

准备工作:ubuntu中安装Apache2,php5,mysql,及 postgres。具体的步骤可以去搜下,一般的多是apt-get install 就OK。postgres 安装名为postgresql

具体还可以参照authpuppy官方doc ,http://www.authpuppy.org/doc/Getting_Started。这个一定要看!写的很详细。
1.首先在authpuppy 官网下载源码http://www.authpuppy.org/。找到download,去下载authpuppy-1.0.0-stable.tgz 该版本。

2.将authpuppy-1.0.0-stable.tgz代码解压到/var/www/目录下后,访问http://localhost/authpuppy/web/ 会访问到preinstall.php,下面开始安装。先按照http://www.authpuppy.org/doc/Getting_Started中,将PostgreSQL数据建立成功。成功后,按照Getting_Started帮助手册,修改/etc/apache2/sites-available/default 这个文件,内容如下:

<VirtualHost *:80>
       ServerAdmin webmaster@localhost
       ServerName authpuppy.localhost
       ServerAlias authpuppy.test

       <span style="color: #ff0000;">#DocumentRoot /var/www/authpuppy/web/</span>  <br>    DocumentRoot /var/www/     <br>    DirectoryIndex index.php
       <Directory /var/www/authpuppy/web/>
               Options Indexes FollowSymLinks MultiViews
               AllowOverride All
               Order allow,deny
               allow from all
       </Directory>

       Alias /sf /var/www/authpuppy/lib/vendor/symfony/data/web/sf
       <Directory "/var/www/authpuppy/lib/vendor/symfony/data/web/sf">
               AllowOverride All
               Allow from All
       </Directory>

       <span style="color: #ff0000;">#ErrorLog /var/log/apache2/authpuppy/error.log
</span>    ErrorLog /var/log/apache2/error.log<br>   
       # Possible values include: debug, info, notice, warn, error, crit,
       # alert, emerg.
       LogLevel warn

       <span style="color: #ff0000;">#CustomLog /var/log/apache2/authpuppy/access.log combined
</span>    CustomLog /var/log/apache2/access.log combined<br>  <br>     
  </VirtualHost>

加红色部分为Getting_Started中给的原样,我针对这个做了部分修改。关于两个log,因为/var/log/apache2/目录下没有authpuppy 这个文件,所以加这个的话Apache重启时会失败,所以将其去掉(或者你自己添加上也可以)。

$ sudo service apache2 restart

重启Apache,访问http://localhost/authpuppy/web/ .会出现第一个页面,点击let's go按钮。然后进到下一个页面上,这里会提示你什么文件没有可写权限或者没有安装某个php的扩展,按照上面提示做就可以了!还有注意一点。有时候点击let's go 就会出错,页面就访问失败了!这里可以将/authpuppy/web/installed.txt 这个删除掉。就可以了!处理好后点击next。进到连接数据库页面。我刚开始这个页面总访问不进来。这时按照http://www.authpuppy.org/doc/Getting_Started,将环境设置了一边后就可以访问了。具体的原因没有查明。然后就是与数据库连接,数据库选择postsql,注意用户名密码是否正确。过了这个页,基本上就是成功了。

用自己的话写的比较粗略,只供自己下次再搭建该环境时有个提醒。(这次就是第二次,又花费了一天多- -),第一次搭建步骤都忘了,所以想记录一下过程。主要是参考这两个链接:

http://www.authpuppy.org/doc/Getting_Started

http://blog.sina.com.cn/s/blog_d2facf270101g7hy.html ;wifidog+authpuppy认证页面的配置

本文章由 http://www.wifidog.pro/2015/02/25/ubuntu%E5%AE%89%E8%A3%85-authpuppy.html整理编辑,转载请注明出处